INTRODUCTION
The popular Webform module has been the longtime standard for creating surveys, applications, registrations and other types of forms used for collecting information from users on Drupal websites. However, because the Webform module is restricted to the basic field types that are included with it, as popular as the Webform module is, it is also limiting in the type of fields that you can use to collect your user data.
Although the fields included with Webform are often all you need for many basic forms, there are many situations where you may need additional field types that are not possible with the Webform module. This is where the Entityform module is most useful.
The Entityform module allows you to build forms using any available fields from Drupal core or contributed modules. For example, you can create a form using the Address Field module to collect user addresses with properly formatted address fields that change dynamically for each country the user may select.
Other field examples include Entity Reference fields to reference Node, User and other Entities. It even works with the Inline Entity Form module to create a very nice widget for adding multiple referenced entities to a form! Link/URL fields, Field Collections and Phone Number fields are few other possibilities using the Entityform module.
The Conditional Fields module can be used to dynamically hide, show and make required fields within your form to create complex if/then scenarios for showing fields and creating dependencies.
Another option is the ability to use the Field Permissions module to control access to fields on an Entityform. With the Entityform module the field options available for creating your forms are substantially increased. The allows you to make forms look and behave just the way you want.
Besides being able to use any Drupal fields, some other features of the Entityform module include:
- Form Submissions are available to Views allowing you to create flexible reports, views and submission data exports
- Uses Rules, allowing for complex conditions and actions to be performed on Entities, including sending notifications
- Flexible and customizable through the UI
- Allows Draftable forms
- Works with Features
- Because Entityforms are standard Drupal entities you can also:
- Use Drupal Services to perform CRUD operations on Entityforms
- Use entity hooks on them to access, modify and work with Entityform data, such as:
- hook_entity_load
- hook_entity_insert
- hook_entity_update
- hook_entity_delete
- hook_entity_presave
- hook_entity_view
- hook_entity_view_alter
WHEN TO USE
Although Entityform is more powerful and flexible than the Webform module it may still not always be the best choice. It may still be recommended to use the Webform module if you only need a simple form and Webform’s built in fields work for your needs. Also, Webform is usually quicker and easier to setup, especially if you need to send emails upon form submissions as Entityform uses Rules to send submission emails and this required a bit more work to setup.
Lastly, Webform stores value data more efficiently. If your forms may have many (50+) fields on them then Entityform may not be the best choice. More info can be found on this page.
EXAMPLE SETUP
Now we’ll walk through a basic setup and example usage of the Entityform module.
NOTE:
This example uses the 2.x branch of the Entityform module. If you’re using the, now deprecated, 1.x branch then the information in this example may vary from your setup. The most notable change from 1.x is that the 2.x now uses Rules for sending notifications.
INSTALL AND ENABLE
Download and install the Entity form module from Drupal.org

For Drush:
drush en entityform -yRequired Dependancies:
- Chaos Tool Suite (ctools)
- Entity API entity
- Views views
NOTE:
For this example we will not be using the built-in “Entityforms Notifications” module so you will not need to enable it.
Navigate to the Entityform administration page located at STRUCTURE->ENTITYFORM TYPES (admin/structure/entityform_types) and click the “Add Entityform Type” link.

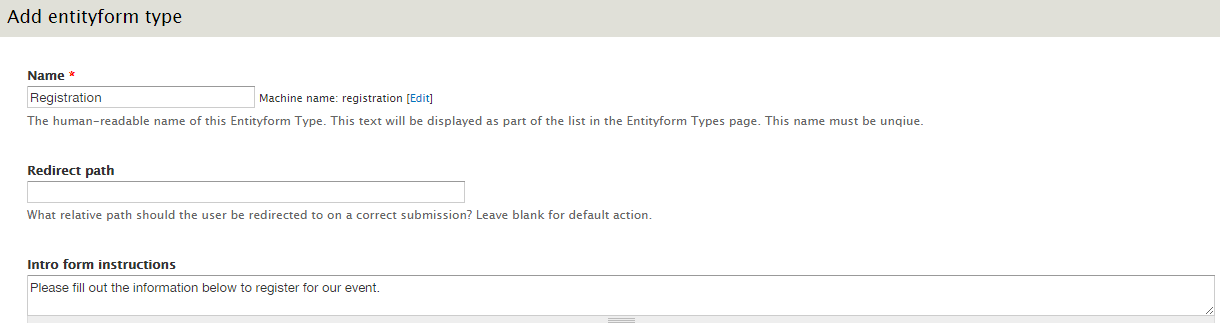
Fill in the basic form information, including Entityform name and any instructions you want to be displayed above the form. For example, for an Event Registration form you may enter something like:
The Entityform Edit page has seven vertical tabs containing various configurations available. We’ll go over a few of the most important ones here but it's worthwhile to take some time and familiarize yourself with all of the options available.
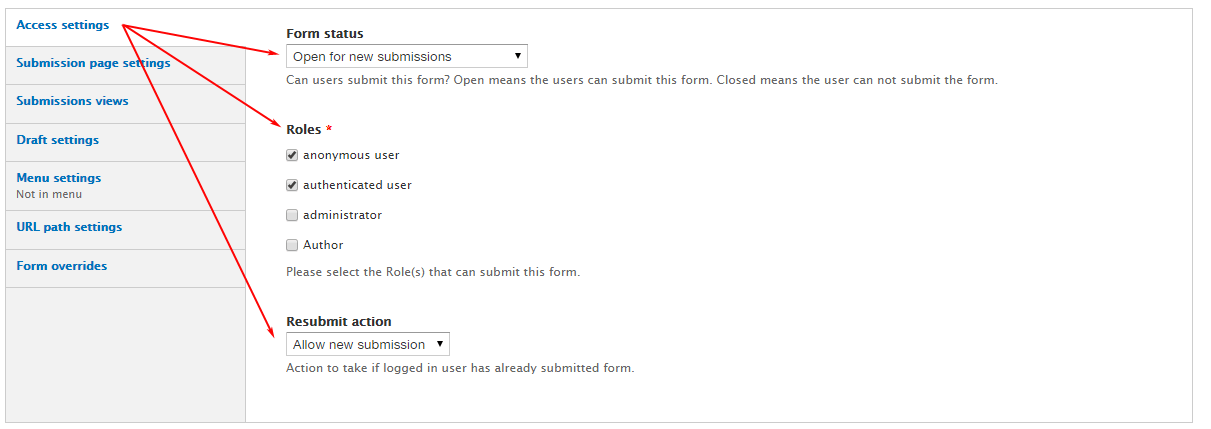
Access Settings
This section contains options to enable/disable the form, setup permissions (per role) and set the action to take if a user tries to re-submit the same form again.
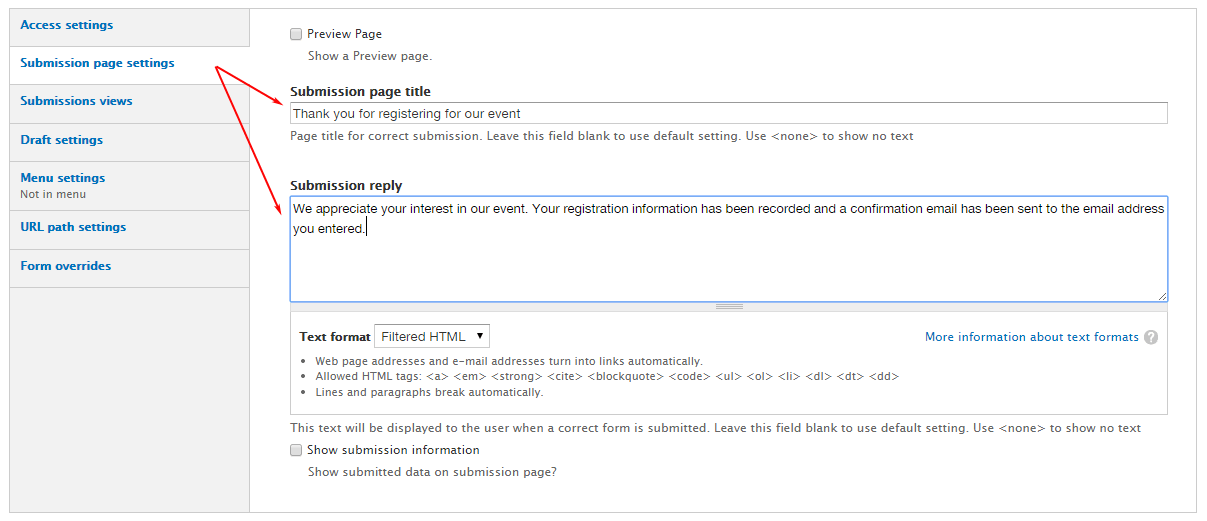
Submission Page Settings
This section contains options to create a custom submission page to be displayed after the Entityform is submitted. You can enter a title and page content to be displayed here. You can also enable a preview page so the user can review their information before submitting the form.
Submission Views
This section allows you to select which Views are used to display submission reports. There are areas here, the first View is for administrator reports to view all form submissions and the second View is for a user to view their own submissions.
The Entityform module comes with two default Views that will already be selected here. If desired, you can create your own custom View(s) to display submission reports for administrators and/or users. To create an Entityform submission View be sure to select “Entityform Submission” from the “Show” type when first creating your View.
Draft Settings
This section allows you to enable and configure a draftable Entityform. A draftable Entityform will be able to be saved by the user to come back at a later time to complete and submit.
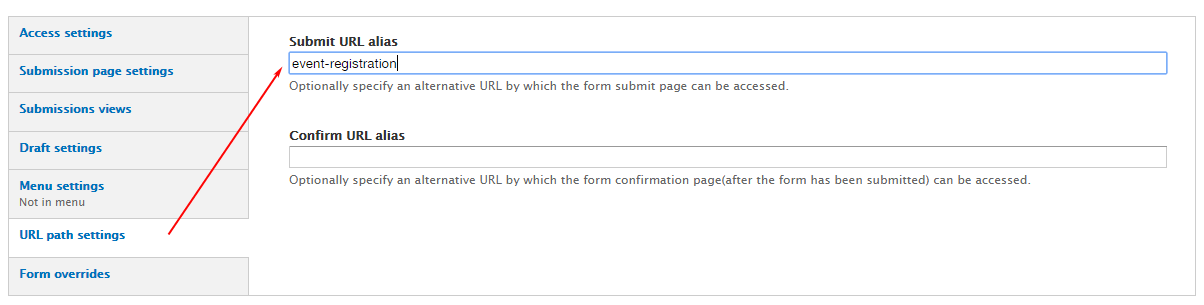
URL Path Settings
All Entityforms that you create will be accessible by a hardcoded URL derived from the form’s machine name. If desired, you can enter an alternative URL to override this default and the form can then be accessed from this new URL for submission.
Form Overrides
Lastly, the Form Overrides section contains fields to enter any custom text you may want to be displayed on various areas of your form such as the submit button and view titles.
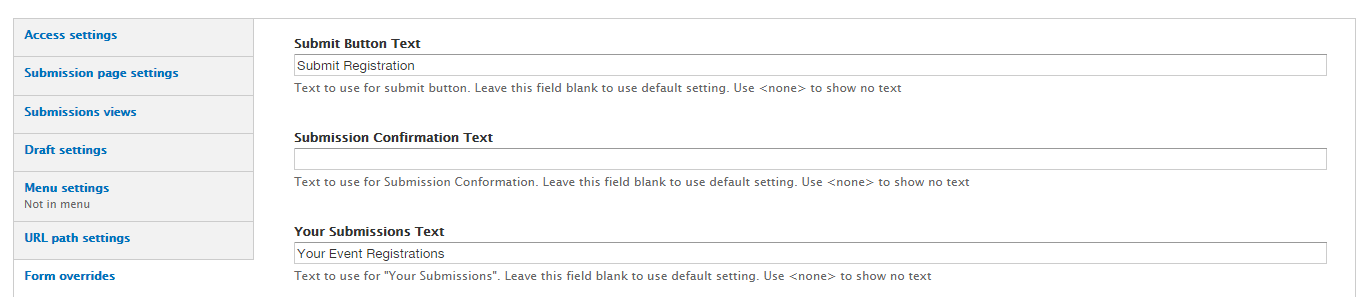
Once the basic Entityform configuration is completed click the “Save Entityform Type” button.
FIELD SETUP
This is where the Entityform module really shines. Now we’ll add some fields to your form.
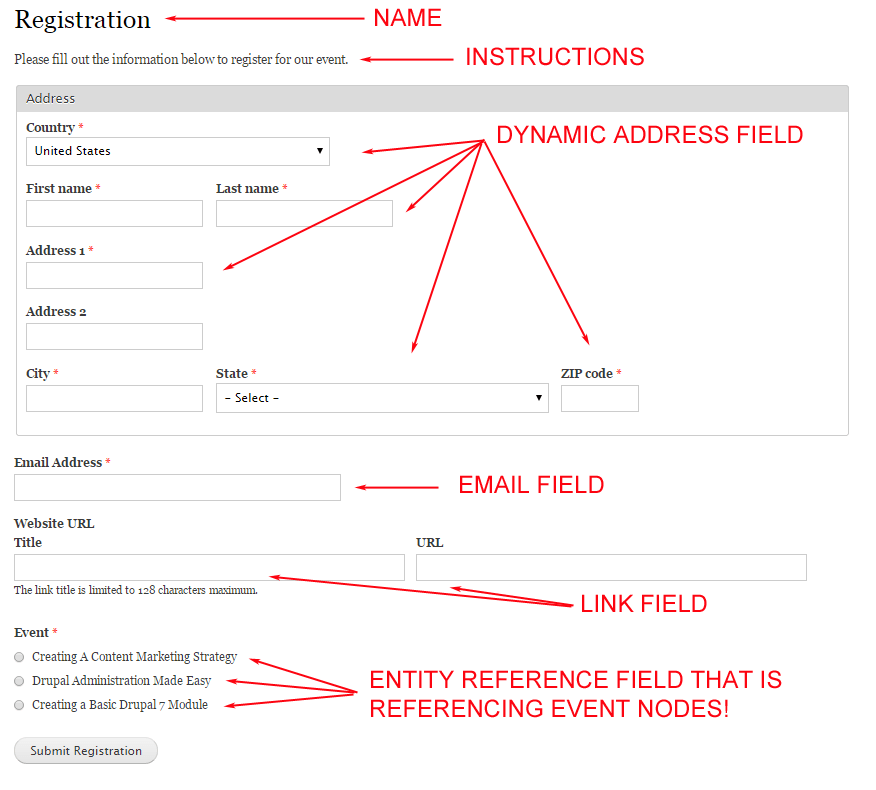
Click the “Manage Fields” link and you’ll now be taken to a standard field manager page just like any other Drupal Entity. From here you can add any fields available to Drupal into your form. The core Drupal install comes with some basic fields like Text, Number, List and File; besides these you can also install any contributed field modules to extend the options available. In this example we’ve installed and added an Address Field, Email Field, Link (URL) field and an Entity Reference field.

Add and configure the fields as required for your form. In this example we've added Postal Address, Email, Link and Entity Reference fields. Click the “Save” button once completed.

Congratulations, you have created an Entityform that can now be accessed and submitted. The form can be accessed through the “Submit Link” URL. Every submitted form is saved as an Entity to the Drupal database and can be setup to be displayed to users and admins for reviewing and reporting. Since the Entityform submissions are accessible to Views, you can create customized displays and even use the Views Data Export module to create CSV, XML and other types of exports from the submission data.
Below is an example Entityform setup using the fields noted in the example above. Note how the address field is formatted correctly and will dynamically change formatting depending on the country selected.
SUBMISSION RULES
Drupal Rules can react on the Event “After saving a new Entityform submission” so you can perform actions when an Entityform is created (or edited). The most popular action to perform is sending an email to an administrator and/or the submitter.
IMPORTANT NOTE: Things can get a little tricky here as there are multiple ways to setup email rules for Entityforms. We’ll cover one method here that doesn't not use the Entityform Notifications sub-module that comes with Entityform. We found that using standard Rules tends to make the most sense and is more straight-forward for us but this may not be the best or most practical method for your scenario.
To send notifications you’ll also need:
- Rules Module rules
- Token Module token
To send HTML emails you'll also need to install and enable:
- Mimemail Module mimemail
- Mail System Module mailsystem
CREATE A RULE TO SEND AN EMAIL NOTIFICATION
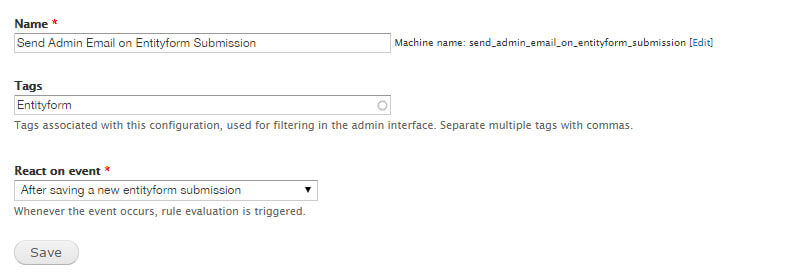
Navigate to Configuration->Workflow->Rules (admin/config/workflow/rules) and click the “Add New Rule” link.

Give your Rule a name, optional tag and then select “After Saving a New Entityform Submission” from the React on Event drop-down box.
Click the “Save Button”
NOTE: There are also other event reactions available to react upon when editing, viewing and deleting Entityform submissions.
Now you can optionally add any conditions to this rule, such as “data comparison” on the “entityform:type” to check if the submission is from a specific Entityform type. This is handy if you have multiple Entityform types and want to send different emails for each type.
The last step is to add your Action(s). In this example we’re going to send an HTML email.
Click the “Add Action” link and select “Send an HTML Email” under the System group in the drop-down box and fill in the email field to suite your needs. Most of the fields should be self-explanatory and, remember, you can use any available tokens in these fields.
TIP: You can use the token [entityform:type] for the mail key.
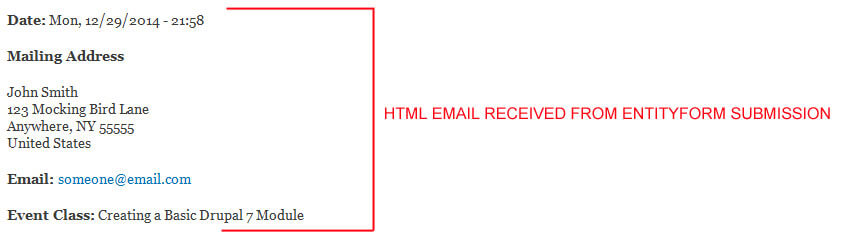
Since this is an HTML email, you can use HTML markup for email the Body field. The values below are what we entered into the Rule's Send HTML Email Body field and the tokens used in the example correspond to the field names we created for the Entityform in the examples above. This, of course, will vary depending on the fields you use and names you give them.
Example Body Content using Field Tokens:
<strong>Date:</strong> [entityform:created]<br /><br />
<strong>Mailing Address</strong>
[entityform:field_address]<br /><br />
<strong>Email: </strong>[entityform:field-email-address]<br /><br />
<strong>Event Class:</strong> [entityform:field-event]<br />
Once completed, click the “Save” button. If everything is setup correctly, whenever a new Entityform submission is created an HTML email will now be sent to the address you've setup in the Rule configuration. In the screenshot below, notice how the address field it properly formatted automatically? Very nice indeed!
WRAP UP
This is just a brief introduction. The Entityform module is extremely flexible and offers many options and various ways to tackle form configurations. Hopefully this will help you get started to create the Entity Forms you need on your site.